
Motor now set, I was surprised to see the motor mount bracket mounting point on the block was in line with the k member. This is a good sign because I won't have to make a custom k member and it means the motor is near center on the k member for weight distribution. I found that I could drill the holes for the mount and have it offset enough to clear the steering rack like so:

It doesn't look like the 350z manifolds will clear my mount bracket so they will be removed for now. Hopefully the Nismo Frontier headers will clear if not ill just fabricate ones that will.
So now to make the first basic parts of the brackets, the mount plate to the engine and the mount plate to the motor mount itself.
The plates to the engine are simple trace and cut out, then test fit to engine.


Cut out the plate:

Being that hole saws use a pilot bit to hold them in place, it drills a small hole dead center of the plate which works out perfect for my needs. The pilot hole was two small so I just drilled it out bigger to suit the mount.

Perfect fit except there is a alignment dowel as I call it that won't allow the plate to sit flat unless it is also drilled into the plate.


So I took a nut and bolt and held the mount plate in place on the stock 350z mount arms.
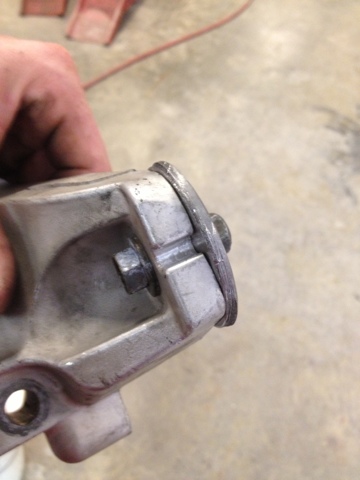

Found a drill bit about the same size as the hole needed to be drilled. Drilled it.

Result:

Test fitted:

I noticed that my drivers side mount is slightly under the body of the Miata. I am all about ease of maintenance so I am going to position the passenger side mount in a little closer to the engine for clearance and ease of engine removal if I ever have to pull it back out.
So I placed the passenger side mount in place all the while being careful not to obstruct the starter. I then did the same thing I did for the drivers side mount bracket, made a template and tack welded the arms in place. I cut loose the zip ties and rechecked my torpedo level.

Still level!
Pulled the motor out. Pulled the brackets off. Welded them solid. Sand blasted them in preps for powder coating later.
Drivers side:

Passenger side:

I will be putting the car on my lift next and bolting the transmission to the engine in preparation for making the transmission mount.
No comments:
Post a Comment